Today, I am going to do a short and simple walkthrough to fix an iffy command dial on a Fuji GA645. It’s a very simple task that could take you 10 minutes to potentially save you a few hundred bucks on one of these cameras if this is the issue that permits a huge discount. It’s not guaranteed to fix the issue, but this issue is common and this fix (sort of) worked for me, so it may work for you.
A couple weeks ago, I spotted an eBay auction for a Fuji GA645. It’s a camera that I have always wanted a chance to shoot and get my hands on, but never pulled the trigger on. Ever since my friend Ryan got his GA645zi, I knew that I had to at least try one these for a while. The camera in the listing wasn’t in pristine shape, the seller noted two main issues with the camera but the more concerning issue was the wonky command dial that would randomly choose an aperture as it was turned in
Fast forward to the other day, just a few minutes before the end of the auction. While jamming to the live sounds of Blacksmith, I noticed that the auction price was still below half the value of other listings that were in decent condition, so I took a gamble and got a deal.
Prior to receiving the camera, I did a little bit of research on the web and came across a few helpful links, one being a Flickr discussion thread on the same topic and a Youtube video that showed how to disassemble the top part of the camera.
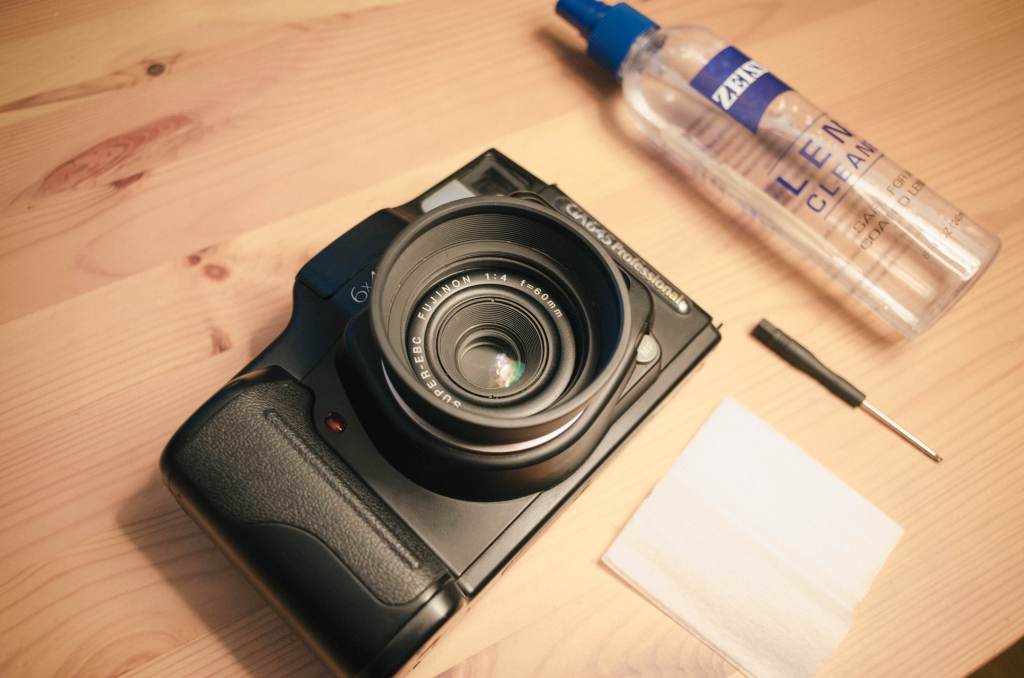
When the camera finally arrived, I gave it a quick exterior cleaning, pulled up those two resources, I gathered a few materials to get to started on trying to curb the dial issue.
All that was necessary was some lens cleaning tissues, lens cleaning solution, and a small screwdriver I borrowed from my iFixIt kit that I use for fixing my Macbook.

Step 1, Removing the Top Cover
To start off, you have to locate the the five screws holding down the top cover down. There are four around the bottom part of the top plate around the camera. The last of the five screws is located underneath the flash. You have to bit a bit careful not to lean up against the flash too heavy since the flashes and the wires that connect it also have a tendency to be rather fragile.


After removing all of the screws, you have to do a little wiggling from front to back to get the top cover to budge and come up and off. Be careful removing; don’t pull to hard or too far. Remember that there are ribbon cables and other wires connected between the main body and the cover. Just lift it enough to gain access to the dial sensor underneath.

Step 2, Cleaning & Dust Removal from the Sensors
Spray a bit of lens solution or rubbing alcohol to dampen a lens tissue. Lens tissues are good because they’re not too abrasive and they’re thin enough to get it where we need them to. I think it goes without saying but don’t saturate the lens tissue too much, just enough for it to grab whatever dust and dirt may be hanging out under there. I folded my lens tissue in half, flattened and wiped between the plastic locking mechanism for the exterior dial and the PCB.

Step 3, Reassemble and Test Command Dial:
The reassembly is the same as when you took it off except for one small caveat. When you replace the top cover, you might notice that it doesn’t line up properly on the right side. Just turn the command dial a click or two and the cover will then lock in and seat itself properly.
Before you put all the screws back in, turn the camera on and test the command dial. If it doesn’t work still or seems to be improving but not jumping numbers as frequently, then maybe try a bit more cleaning. If it works, then congrats, you probably saved yourself a bit of money on the camera and repair costs.
Conclusion: This isn’t a guaranteed fix, but it seems that the issue is not as consistent after doing this little bit of cleaning. But there is definitely an improvement for sure.

Leave a comment