Tag: filmisnotdead

  • Student Photo Exhibition 2017

    Student Photo Exhibition 2017

    Last week, the first half of the school year came to a close.  What that meant for me and my twenty photography students was that it was time to show their friends and families what that have been doing for the past eighteen weeks.

    Every year, I put together a small photography exhibition of my film photography students’ work at our school. As most film shooters can agree, it’s so much nicer to see and hold a tangible image.  The printing process, both through enlarging and digital scanning and printing, is not a step I like to skip over when it comes to the club.  We get a little dressed up, display our gear and our images, and talk to our guests about our processes and experiences as photographers.  It’s always held the week before we get off for the Winter break, and something about that makes the environment a bit cozier and more intimate.

    Every year is always better than the last, although I am not sure how it can get much better.  Although, I do try to add a new element to the club each year to make it better and a bit more unique from the last.  This year, we were able to add a darkroom within the school to our program.  In addition to this, I also changed up my instruction a bit as well.  In years past, I started my beginner students with point and shoots, however I decided this year that everyone was getting an SLR.  The images, the crowd, and the vibe of the evening did not disappoint.

    This year, I was lucky enough to have two assistants help me run the club.  These two now-high-school students are past students of mine that came back every Wednesday evening to donate their time for the club.  Not only are they extremely helpful but have become pretty darn good photographers, too.  Without them, my job would not be as easy, that’s for sure.

    On the two days leading up to the event, we spent a bit of time preparing for the event.  We gathered all of the darkroom prints, placed them in individual folders to go home with the students, printed some digital copies for display, made name cards, put together some gift bags, hung photos, mood-lit the space and decorated accordingly.

    At about a quarter-to-seven, my students with their friends and families started filing into what is essentially our all-purpose room.  When seven p.m. rolled around, I gave a little talk on the status of the film world as I know it, basically just explaining the fact that there is a pretty big, and very passionate, close-knit community of die hard film enthusiasts that are keeping the craft alive.  Not only that, but that this community is ecstatic that these students are shooting film and support us specifically and individually.  And that due to this enthusiasm and the people within the community, this club and event is all made possible.

    Thanks to the cameras we use donated from the Film Photography Project and the gifts that the kids got to go home with from Shoot Film Co., this event truly comes together.  In addition to that, my administration is extremely supportive of what I do and I also have a pretty good support system made up of my closest friends who also shoot film to come out to check out the kids’ work and really make the kids feel good about what they do.  I just want to make it clear that even though I am the one directly instructing and interacting with these students, it takes the village of film shooters to make this what it is.

    After making a short introductory speech, guests enter our gallery hallway which is lined with photos, and sprinkled with cameras, developing materials, and other things to spark conversation and questions from our guests.  This is where parents and students both excitedly search for where their photos are located, take some pictures together, eat some cookies while I usually I get to talk to some of the families and tell them more about how great their kids are simply for being a part of the club and what I love about their work specifically.

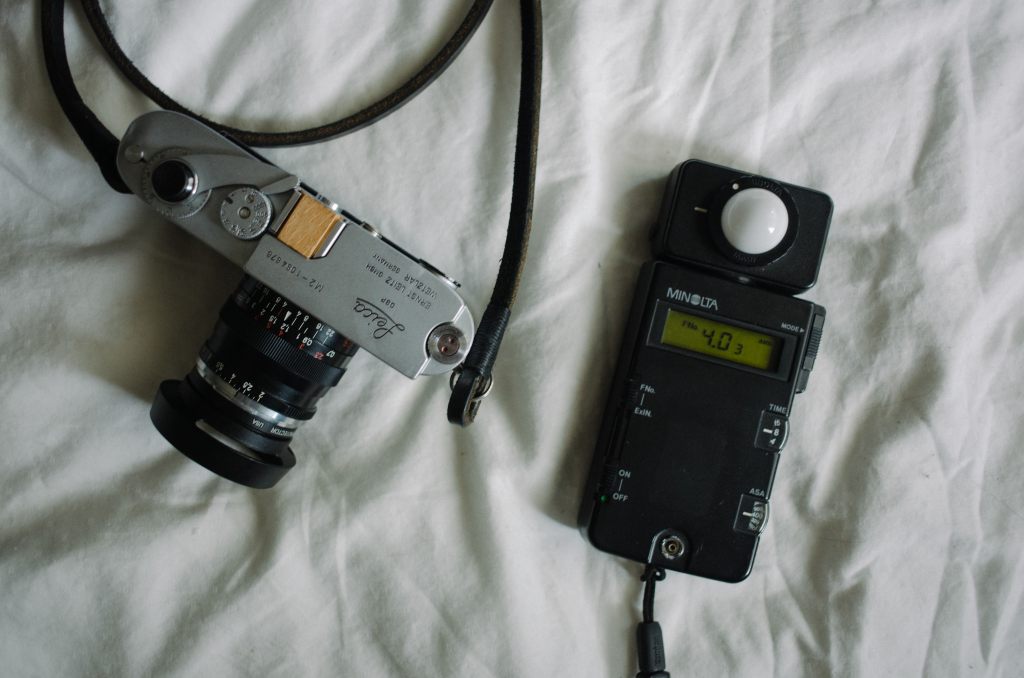
    We also set up a couple of neat displays, one being of some old glass plate negatives that one of my coworkers picked up for me at a yard sale a few years back.  It’s a cool way to let people see what film was before film was….well, film.  Next to these, we also display some of our darkroom tests prints to show the guests parts of the process that may not be regularly visible in a final presentation.  It gives great insight to the fact that this is a process that takes a lot of trial and error and that mistakes are not only commonplace, but are expected to occur in order to make us better at our craft.

    While students and parents walk around, admire photos and take photos of their young photographers in front of their work, I quietly peruse the space with one of my close friends to choose five photos that will receive recognition in the form of a certificate when everyone returns to the the seating area.

    As things start to wind down, everyone eventually heads back to the all-purpose room where students are called up individually to receive their gift bag and darkroom prints.  Gift bags include a few film-related pieces from Mike Padua of Shoot Film Co: stickers, buttons, and notebooks.  This time also gives me a great opportunity to quickly speak and compliment (maybe embarrass, too) the students personally on their work as I show their darkroom prints to the audience.

    After all students receive their things, I close things with a thank you to not only the students, but also to their parents who support their children and their artistic interests, something that I think schools could all use a bit more of.  At this point, I usually talk just enough to make myself cry because I am so dang proud of these kids.  But this time, I made sure to cut the speech just short of that to wish everyone a great holiday and to give a thanks to the kids for allowing me to be a part of their every Wednesday just to experience and appreciate the photographic process together.

    All images taken by Nick Anatala.

  • Why You Should Leave the Light Meter at Home (At Least Once)

    Why You Should Leave the Light Meter at Home (At Least Once)

    Why You Should Leave the Light Meter at Home (At Least Once)

    When I first started shooting film, I toyed around with some auto-exposure point and shoots (I think I still have that Canon SureShot 35AF somewhere) that I picked up from a local thrift store.  I simply just wanted to give film a try.  As I quickly researched and progressed through different 35mm cameras, I finally mustered up the courage (with plenty of pressure from a friend of mine) to purchase my first medium format camera.  Not only did I not know how to load my new-to-me Mamiya 645 Pro TL with a non-metered prism, but this would also be the first time that every step of the photographic process would become a more manual experience.

    Mamiya 645 Pro TL w/ 80mm // Kodak Portra 400

    I had never used a light meter, loaded a roll of 120 film, nor had I ever really forced myself to manually focus prior to the purchase of that camera.  At that time, I remember being so afraid to learn how to work a light meter.  For some reason, that device was just intimidating, not worth the expense (neither was the metered prism), or too cumbersome to carry for whatever reason.  After a quick search or two, I found a few mobile light meter apps that seemed to be much more inviting and user friendly until I could muster up the bravery to try a real light meter.  Something about the older ones with all of the numbers really frightened me for some reason.  Knowing what I know now, of course a dedicated light meter performs much better than your cell phone, but at the time, it did the job in letting me get the shots that I wanted and enabled my dependence on using something to evaluate the light in a scene.

    The photos I got with my Mamiya are still some of my absolutely favorite photos I have ever shot.  Not only do I love the shots I took with that camera, but there was something about that learning experience that make those pictures a bit more sweeter and more meaningful.

    Mamiya 645 Pro TL w/ 80mm // Kodak Portra 400

    Over the course of the next few years, I bought, sold, and traded a bunch of different kinds of cameras.  Almost every single camera that I wanted to try or get my hands on, it was sort of required that it would have a built in meter.  While I still tried cameras like the Pentax 67 and Hasselblad 500c, I felt that it was more of a chore to shoot these cameras simply because I had to take a light reading out of camera.  And due to my continuous use of a built in meter, I also felt that I would need to meter the scene every single time I decided to take a photo.  I know that isn’t totally necessary now, but everyone’s habits are different.

    Hasselblad 500c w/ 80mm // Ilford HP5

    Fast forward to a couple of weeks ago, I had a chance to get my hands on a Leica M2.  After experimenting with other M-mount bodies like the Konica Hexar RF and Leica CL, I just still didn’t understand the mystique behind the Leica name.  Meanwhile, I am still stuck here lusting after an MP.  But, I figured I would give the M2 a fair attempt with the understanding that I would definitely purchase Voigtländer VC ii meter when I found one for a reasonable price.  Turns out, the VC meter is pretty sought out after, maintains its value on the used market, and people don’t like splitting the meter from the body it’s on to sell separately.  And understandably so.

    With that, I decided to purchase a Minolta light meter for less than $40.  I used it once on the day I got it, and haven’t really touched it since.  Again, I found it to be a bit troublesome to carry around this extra piece of extraneous equipment simply to take a single light reading on a day or shooting.  At a time where I am trying to simplify many things, including the number of cameras and lenses I have on the shelf to choose from, I decided to leave the meter at home from that day on.  I decided to simply use my instincts and all of those basic rules we learn when we first start shooting photos (f/8 and be there, Sunny 16, and so on).  If I really needed to use a meter, I can always pull out my trusty meter app that served me well enough in the past on more than a handful of occasions.

    Yashica A // Kodak Porta 400

    While I have only put a few rolls through my M2 since receiving it, foregoing the meter and trusting my instincts has been a liberating experience.  So far, I have only shot three rolls of rather-forgiving 400-speed Ilford films and a single roll of Kodak ColorPlus 200, but I can happily say that I have yet to waste a single frame from absolutely botching a light estimation in my scene.

    Leica M2 w/ 35mm Zeiss ZM // Ilford HP5

    Sure, I may have missed by as much as a couple of stops, but nothing has been rendered unusable or unfixable with some minor corrections if necessary.  Even when doing a few prints in the darkroom, not much has been lost.  I’ve pushed and tested myself in a variety of environments simply by using the Sunny 16 rule and adapting it to whatever environment I find myself in; whether that be an indoor sporting event, night shooting, or in direct or indirect sunlight.

    I have found that shooting without a meter has been quite a liberating and confidence-boosting experience.  After depending on something for so long and just going without it was a bit uneasy, it was a great way to put my skills to the test.  When it comes to shooting without a meter, I probably wouldn’t say that it’s one less thing to worry about.  If anything, I probably worry about it even more.  As each roll is developed, I and initially nervous and anxious to see if there will be photos throughout the roll, but in turn I have become more and more comfortable in foregoing a meter.  I’m not saying that I’ll go meter-less from now on or even go shoot a somewhat important event without one, but it makes the simple reward of seeing my images that much sweeter.

    Leica M2 w/ Canon 50mm LTM // Kodak Color Plus 200

    If you have been shooting for a bit now, but have yet to go without a meter, then I urge you to just give it a shot.  Perhaps you’ve been looking for a new challenge, or simply want to alter your shooting experience just a bit to break from your normal routine for something slightly new and different.  Perhaps you are like I was; scared to remove that safety net in favor of verified, perfectly exposed shots, every single time.  If that’s the case, then I say it may be time to give yourself some room to make a mistake and simply test yourself.  Give up a little control in exchange for a little bit of uncertainty and excitement.  It makes the process that much more rewarding in the end and chances are that you are way better at this than you think.

  • Reader Excerpts: Guildford on an Olympus XA2

    Reader Excerpts: Guildford on an Olympus XA2

    Today’s piece comes from Sikandar Rana. Sikandar shares a place that is close to his heart and how he has interacted with that place through creating images, both snapshots of daily life and deliberate, time-consuming photo creation.  As Sikandar takes us on his move from London to Guildford, we understand his appreciation for simplicity both in the city in which he resides as well as the simplicity in his Olympus XA2.

    Reader Excerpts allow those who read Now Developing to become part of the collective by sharing a written piece alongside their images on a topic of their choice.  If you have any ideas for a piece and would like to have it featured here, feel free to contact me!

    Guildford on an Olympus XA2, Written by Sikandar Rana (Instagram, Website)

    The town of Guildford, in Surrey holds a very special place in my heart, in that it was the first time that I ventured outside my London home to live away from it for a significant period of time. This time spent living away from home was due to the commencement of my degree in Chemical Engineering at the University of Surrey. The jump from bustling London to a relatively quiet, serene town was quite a shock, but wore off after the first few months.

    I stayed in Guildford for four 9 month periods, one for each year of my course, with the remaining three months of each year being spent back in London. Despite my initial fears, there seemed to be no shortage of things to both see and do around campus and the local area, from attractions such as Guildford Castle to the multitude of events organised by the friends I’ve come to know throughout my degree.

    In addition to the places in and around campus that I deemed worthy to document, a few images in my collection also capture the first time that I had lived in rented private sector accommodation. This was the case during my fourth year, having lived in university accommodation during the three years prior.

    I’ve been practising photography on and off for about 5 years now, but it wasn’t until the last two years of my degree that I began taking film photography seriously. What began as an attempt to document the antics of those friends of mine who I wouldn’t have seen as frequently once I’d completed my degree blossomed into so much more during those final two years of university.

    Like many other advocates of film photography, I came for the visually pleasing output of most film stocks, and stayed for the way shooting film slows one down and makes their photography more deliberate.

    I brought the Olympus XA2 that all of these images were taken on in my final year of university, with most of my prior photography being done using digital cameras. I wanted a small, compact way to shoot film day-to-day without sacrificing quality and the signature “look” that film is known for. I also have a Pentax ME Super, but that is usually used when I go out with the intention to take photos, and is much better suited to the slower, more deliberate types of photos that I shoot when I go out with this purpose in mind. Both cameras were bought from eBay, and have served me very well, being as reliable as can be.

    I started shooting colour film initially, having being drawn to the pleasing examples of different film stocks posted all over the Internet. Due to the low cost of Fujifilm Superia 200 and Kodak Colorplus 200, those were the two main film stocks that this series of photos were taken on. I bought the rolls of film used for the series from a combination of Boots and London Camera Exchange outlets found in Guildford’s town centre.

    London Camera Exchange in particular turned out to be a treasure trove of film and photographic equipment, and I’ll definitely be stopping by to pick up a few rolls next time I find myself in the area. The rolls of film were developed and scanned at the same Boots outlet that some of the rolls were bought from. Thank you ever so much for reading my insight of Guildford through the lens of my XA2, and happy shooting!

  • Part of the Process: Eric Löfgen

    Part of the Process: Eric Löfgen

    Part of the Process is a series of posts that puts the spotlight on film photographers and DIY film developers.  These features provide unique experiences and perspectives on shooting and developing film while also showcasing diverse talent and film photographers around the globe.  If you are interested in being featured, feel free to contact me!

    Name: Eric Löfgen

    Location: St. Vith, Belgium

    Links:

    Flickr

    Instagram

    What other websites or blogs do you keep up with to feed your photographic interests?

    Petapixel, Lomography, ishootfilm, and Matt Day on Youtube.

    What attracted you to film photography? How did you get started/introduced to shooting film? How soon after did you start developing?

    I never really was interested in photography, I was more into music during my youth. Sometimes, my best friend took his camera to our rehearsals and he shot some pictures of us. What I really liked about that, was that two months later he showed us the shots. I was used to that when I was a kid because of my parents, but seeing this years later fascinated me.

    A few months later, I contacted another friend who was into photography, to give me a quick lesson about exposure and all that. He gave me his Pentax and I took some shots. After that it took me almost a year until I purchased my first own 35mm camera. It was a Yashica MG1 that I found at the flea market. I still had some troubles shooting because the exposure was fixed to around 1/60s and I didn’t like rangefinders at the time.

    Another two or three months later, an old friend contacted me. His grandfather died and they found his old photo gear in the attic. It was a Canon AE-1 with a 50mm, a 28mm and a 80-200mm. I immediately bought it and I’ve never regretted that decision. I started shooting more and more, mostly landscapes.

    But I was still learning, I shot a few rolls who were completely underexposed. I wanted it too fast — so I started to teach myself more about exposures and ISO. After that, I was in a buying rush, everything I saw on flea markets had to be mine. I got into developing at home, because my local development spot charged me about 24€/roll, which was really expensive because I was shooting a lot more by this time.

    I started with a Adonal black and white starter set. The next evening, I developed my first roll. The pictures were bad, but the feeling while pulling the film out of the spool was unmatched. Seeing that I nailed it was a great feeling. Half a year after that I started with C41-color development.

    What do you like to shoot on a regular basis?

    I mostly shoot portraits at the moment. To me, portraits are the best way to capture feelings.

    What formats, cameras, and films do you shoot? What do you like about the formats, cameras, films you prefer? 

    I’m shooting a few 35mm cameras: Canon A1 & AE1 and a Rollei 35s.  I use my 35mm for action shots like concerts and skateboarding. They allow to jump in and take the shot because they are a bit more handy. They are more of  a snapshot camera to me, if needed.

    For medium format, I am using a Yashica Mat 124.  I’ve been forcing myself to shoot only with my Yashica Mat 124 this past summer, to learn more about the camera and to slow down a bit more. I’m using this camera mostly for portraits and landscapes. It allows me to think about what I am about to shoot.

    I am also shooting Polaroids using a Polaroid EE66.  My polaroid camera is just for fun. It is mostly used on evenings combined with drinking with friends.

    I’m still looking for my favorite film, but I am currently shooting Kodak Portra series, Ilford HP5, Ilford Delta 400, and Fuji-100.

    What types of film do you develop?

    C41 and black and white.

    Tell us about your first experiences in developing your own film.  How did you muster the courage to give it a shot? What resources did you use?

    I remember my first roll quite well. It was a 120 roll of Ilford FP+. It was actually kind of a risk. I never did the spooling with a medium format film and I wanted to try this the first time in complete darkness. It took me half an hour until I got the film into the spool and at the end, I wasn’t even sure if it was right. During this half hour I thought “What the fuck? Why am I even doing this? This is nuts! You won’t succeed!”. When I turned the light on, I proved myself correct because I mistook the backing paper for the negative. Beginner fail.

    I did some research on the internet and everyone was saying something different. I read many blogs, watched many youtube videos. To be honest, I did not expect any results. So many ways, and so many different times to develop film.  I just didn’t know where to start. But when I opened the tank and I saw something, I realized that I did it. I developed my first roll of film!

    What is your development process like now?

    At first, I’m shooting some rolls until I have enough film in my fridge. After that I start developing. When everything is dry, I start scanning. Mostly with a good beer, because it takes forever. After scanning I’m archiving the rolls.

    What’s your processes regarding scanning, enlarging, and/or printing your work?

    I scan all film myself with a Canon 9000F Mark II. Not the best scanner in the game, but it’s alright. I’ve bought an enlarger on eBay, did some prints but I didn’t find the time yet to really get into it.

    Sometimes I’m developing with friends. These evenings are special to me. We’re both creating something this evening. Drinking a beer during and talk about life. This is something unique that I really enjoy about my process.

    What equipment are you using to develop your film and why?

    I’m using the paterson beginner set with Paterson 35mm and medium format tank with Adonal black and white chemicals. I’m using the Tetenal C41 for color. I did not choose a special brand, the monetary offer just was simply attractive to me.

    Are you content with where you are now with your shooting and developing? Do you have any future plans or ambitions?

    I’m still looking for my way in this world. I’m currently trying to improve my development process. I’m also trying to shoot more with models/people I don’t know. That’s something I’m afraid of but I’m ready to try something new. I always learn by doing, so that’s something I have to do.

    Have you completed any notable projects or in the process of creating something from the film you have shot and developed? 

    I just started my first project called a summer on 6×6. The concept is very simple. I shoot my Yashica Mat124 all summer and develop them come Autumn. Maybe I’ll do some prints, or maybe even a book. We’ll see. I have some other projects planned for the coming years.

    What advice can you give to others who are interested in shooting and developing film but are apprehensive about getting started?

    Try it and don’t be afraid of failing! Failing is normal but you’ll learn from it! You will love it.  Take notes, get into you own rhythm, never stop learning, watch youtube videos, try different techniques … Don’t let anyone stress you. Shooting is my way of relaxing. It allows me to slow down in this stressful world 🙂

  • Part of the Process: Chris Moore

    Part of the Process: Chris Moore

    Part of the Process is a series of posts that puts the spotlight on film photographers and DIY film developers.  These features provide unique experiences and perspectives on shooting and developing film while also showcasing diverse talent and film photographers around the globe.  If you are interested in being featured, feel free to contact me!

    Name: Chris Moore

    Location: Springfield, MO

    Links:

    Pinterest

    What other websites or blogs do you keep up with to feed your photographic interests?

    The Phoblographer, PetaPixel, Film Photographers group on Facebook, YouTube, and Pinterest.

    What attracted you to film photography? How did you get started/introduced to shooting film? How soon after did you start developing?

    Originally, my dad was into photography so as a child it seemed like there were always negatives and prints laying around, and there was always a camera somewhere. I didn’t really get too much into shooting myself until my early 20’s. After a while, film processing was starting to get a bit expensive, so I invested in a good scanner and decided to do it myself with black and white film (at the time, it was the cheapest and easiest thing to do).

    What do you like to shoot on a regular basis?

    Landscapes, flowers, street, and urban scenes, and also very unusual objects. To find beauty in the mundane is part of what makes photography such a blast of a hobby for me, personally.

    What formats, cameras, and films do you shoot? What do you like about the formats, cameras, films you prefer? 

    I shoot a good mix of both 35mm film and digital.  For 35mm, I have a Canon EOS Rebel 2000 that I have used since 1999 for both color and black and white. Not long ago, I inherited a Pentax Spotmatic with assorted lenses (50mm, 100mm, 28mm) purchased by my father while serving in the Marines in Japan in the early 60’s along with a newer Pentax MV with the standard prime 50mm SMC lens. For its historic value I have tried not to use the Spotmatic too much, but I got an adapter ring to use the M42 lenses with the newer K mount, so I am letting the MV be the workhorse camera between the two.

    For film there is nothing like the faithful Canon.  Although, as of late, I have really enjoyed the Pentax MV.  So in terms of preference, it’s a toss up. Manual focusing has proven much more difficult than one might think, but the focusing screen helps a great deal.

    Canon Rebel 2000 with 28-55mm // TMax 400

    What types of film do you develop?

    Traditionally I have always developed Kodak TMax or Ilford films in liquid Kodak TMax developer concentrate, although as of late they charge so much extra shipping for liquids that I have switched to D-76 powder.  Man, have I ever been missing out. D-76 is way better in my opinion, but to each their own. I have done that for many years.

    Last night, for the first time ever, I developed a roll of C-41 using the most common Unicolor kit sold on several sites. The results were by no means perfect (a second blix may be in order) but still very encouraging and promising, and there is nothing like the feeling of pulling film off your reel and seeing color images. It was an experience that encourages me to try it again and keep going with it. As I told my wife – “that was the best 15 minutes of my photographic life.”

    Tell us about your first experiences in developing your own film.  How did you muster the courage to give it a shot? What resources did you use?

    The first developing experience ever with any kind of film goes all the way back to 1999 when I did my first roll of black and white. There was so much I wanted to try and do and I wanted to be able to shoot my photos, bring them home and work with them without the hassle of making a trip to a lab to get them developed and part with perfectly good cash.

    I had practiced loading the reel several times and that helped, though I got in the changing bag and I used a bottle opener to get the film can opened up and I must have fumbled around for an hour to just get it threaded. Lesson learned – cut the film tongue off, it’s much easier to load after that! I got my tank loaded and poured in clear developer mixed from Kodak TMax liquid (at the time I found powder to be very daunting). A few minutes later, I found myself pouring out amber-colored fluid and I was excited — the development must have worked. I went on and rinsed and fixed. The moment of truth came and I pulled the negative off the reel enough to look – and there was an image there! I had done it, and the development had worked flawlessly. I had but to rinse, dry and scan. That was all it took to get me hooked. Digital is nice and very convenient, but there’s still something very enjoyable about the physical aspect of film and chemistry.  There’s something nice about having a tangible result of your efforts that can’t be had with digital.

    The first experience with color film was actually very recent. For the longest time, I never thought color (C-41 or E-6) was very economical or practical to do at home due to chemistry cost and very short shelf life. More recently, I’ve seen on sites and blogs where people are doing C-41 at home and it actually doesn’t cost very much at all with a very decent shelf life.

    I took the plunge and decided to try it on a roll of Fuji Superia ISO 200 film – a WalMart standard and a film that I have had good luck with in the past with pictures. I expected it to smell much worse, but actually there was very little odor left over. It was different working with hot liquids rather than room temperature liquids but it actually was not that much more difficult. My results were by no means perfect – a bit of a brown tinge on some frames and a slightly darker than normal orange mask make me think that a second blix may be in order.  But still, the results were not bad at all and I yielded a few good looking positive images. Very promising results and good enough to encourage me to try again and keep going with this. There’s lots of fun and creativity yet to be tapped into with C-41 processing.

    What is your development process like now?

    1) In the case of film, shoot a roll of the stock of choice in the camera body of choice.

    2) If using my Pentax MV, I rewind the film just until I can hear the tongue break away from the spool. Then opening the camera, I have an exposed film leader, so it’s easy to get my reel started in the light and then put it in the bag to get it loaded the rest of the way. In the case of Canon, I shoot it until there’s 1 frame left, then open it up for that same reason. Granted, that’s not the most efficient use of film because a couple of frames do get lost, but that’s a lot easier than doing it all in darkness. Aside from that with sites like ultra fine online there’s no excuse to pay high prices for film and chemistry.

    3) After the negatives are dry, I scan in 16-bit TIFF format so I am left with the rough equivalent of a digital camera RAW file and then import it into GIMP, at which time I invert my negative, adjust exposure, fix up the color, desaturate for black and white images, and then export to a JPEG to be sent off to either my Pinterest page or the film photographers Facebook page.

    What’s your processes regarding scanning, enlarging, and/or printing your work?

    I primarily scan. I have a Pacific Imaging PrimeFilm 1800u scanner that I bought in 1999 that I still use and it still performs quite well. Astoundingly, it’s still available on Amazon.  I can scan negatives as transparent images, the reason being that the software along with the scanner is quite old and it’s better to just scan it as is, than use newer software (in my case the latest GIMP version) to invert, color correct (or desaturate), and beautify.

    What equipment are you using to develop your film and why?

    I have a standard issue changing bag, Patterson universal development tank, D-76 developer and hardening fixer in the case of black and white.  I use the Unicolor C-41 kit in the case of color.  Additionally, I have some pyrex measuring cups, a graduated cylinder, and a bathroom where it all takes place.

    Are you content with where you are now with your shooting and developing? Do you have any future plans or ambitions?

    As mentioned, I just began my journey into color development and I really want to keep going with that. I also do not want to give up black and white film and I don’t want to replace film with digital by any means. I think both formats have their own value. I don’t really have business plans.  And as far as publishing goes, I would just like my Pinterest board to be seen by anybody who wants to look at it.

    What advice can you give to others who are interested in shooting and developing film but are apprehensive about getting started?

    In this day and age it’s never been easier or cheaper to get into film photography. Film SLR cameras can be had amazingly cheap (in some cases free if you have older family members that embrace technology and happen to like you). Film, chemistry and development gear are also quite inexpensive and quite fulfilling as well. If you’re apprehensive, there’s really no reason to be!