Shutter Sounds is a monthly, ten-song music playlist based upon my most-played music of the previous month. These monthly compilations are not limited or constrained to any theme or genre. They are simply a selection of songs that I chose from my most played artists of the month for the readers to enjoy while shooting, spending time in the darkroom, or want to listen to something new.
Part of the Process is a series of posts that puts the spotlight on film photographers and DIY film developers. These features provide unique experiences and perspectives on shooting and developing film while also showcasing diverse talent and film photographers around the globe. If you are interested in being featured, feel free to contact me!
What other websites or blogs do you keep up with to feed your photographic interests?
The Phoblographer, PetaPixel, Film Photographers group on Facebook, YouTube, and Pinterest.
What attracted you to film photography? How did you get started/introduced to shooting film? How soon after did you start developing?
Originally, my dad was into photography so as a child it seemed like there were always negatives and prints laying around, and there was always a camera somewhere. I didn’t really get too much into shooting myself until my early 20’s. After a while, film processing was starting to get a bit expensive, so I invested in a good scanner and decided to do it myself with black and white film (at the time, it was the cheapest and easiest thing to do).
What do you like to shoot on a regular basis?
Landscapes, flowers, street, and urban scenes, and also very unusual objects. To find beauty in the mundane is part of what makes photography such a blast of a hobby for me, personally.
What formats, cameras, and films do you shoot? What do you like about the formats, cameras, films you prefer?
I shoot a good mix of both 35mm film and digital. For 35mm, I have a Canon EOS Rebel 2000 that I have used since 1999 for both color and black and white. Not long ago, I inherited a Pentax Spotmatic with assorted lenses (50mm, 100mm, 28mm) purchased by my father while serving in the Marines in Japan in the early 60’s along with a newer Pentax MV with the standard prime 50mm SMC lens. For its historic value I have tried not to use the Spotmatic too much, but I got an adapter ring to use the M42 lenses with the newer K mount, so I am letting the MV be the workhorse camera between the two.
For film there is nothing like the faithful Canon. Although, as of late, I have really enjoyed the Pentax MV. So in terms of preference, it’s a toss up. Manual focusing has proven much more difficult than one might think, but the focusing screen helps a great deal.
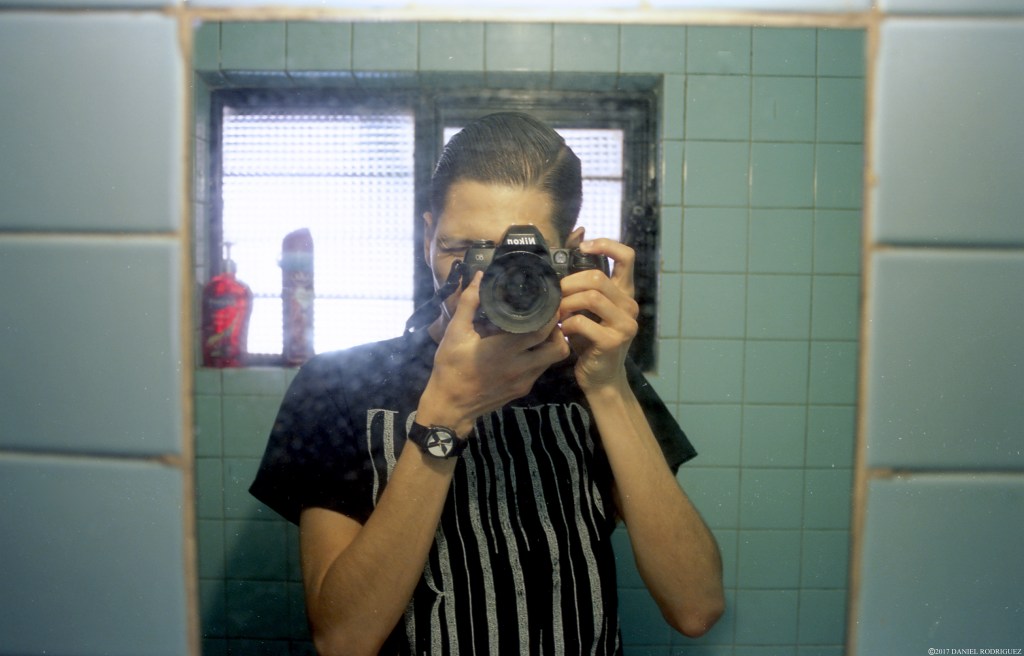
Canon Rebel 2000 with 28-55mm // TMax 400
What types of film do you develop?
Traditionally I have always developed Kodak TMax or Ilford films in liquid Kodak TMax developer concentrate, although as of late they charge so much extra shipping for liquids that I have switched to D-76 powder. Man, have I ever been missing out. D-76 is way better in my opinion, but to each their own. I have done that for many years.
Last night, for the first time ever, I developed a roll of C-41 using the most common Unicolor kit sold on several sites. The results were by no means perfect (a second blix may be in order) but still very encouraging and promising, and there is nothing like the feeling of pulling film off your reel and seeing color images. It was an experience that encourages me to try it again and keep going with it. As I told my wife – “that was the best 15 minutes of my photographic life.”
Tell us about your first experiences in developing your own film. How did you muster the courage to give it a shot? What resources did you use?
The first developing experience ever with any kind of film goes all the way back to 1999 when I did my first roll of black and white. There was so much I wanted to try and do and I wanted to be able to shoot my photos, bring them home and work with them without the hassle of making a trip to a lab to get them developed and part with perfectly good cash.
I had practiced loading the reel several times and that helped, though I got in the changing bag and I used a bottle opener to get the film can opened up and I must have fumbled around for an hour to just get it threaded. Lesson learned – cut the film tongue off, it’s much easier to load after that! I got my tank loaded and poured in clear developer mixed from Kodak TMax liquid (at the time I found powder to be very daunting). A few minutes later, I found myself pouring out amber-colored fluid and I was excited — the development must have worked. I went on and rinsed and fixed. The moment of truth came and I pulled the negative off the reel enough to look – and there was an image there! I had done it, and the development had worked flawlessly. I had but to rinse, dry and scan. That was all it took to get me hooked. Digital is nice and very convenient, but there’s still something very enjoyable about the physical aspect of film and chemistry. There’s something nice about having a tangible result of your efforts that can’t be had with digital.
The first experience with color film was actually very recent. For the longest time, I never thought color (C-41 or E-6) was very economical or practical to do at home due to chemistry cost and very short shelf life. More recently, I’ve seen on sites and blogs where people are doing C-41 at home and it actually doesn’t cost very much at all with a very decent shelf life.
I took the plunge and decided to try it on a roll of Fuji Superia ISO 200 film – a WalMart standard and a film that I have had good luck with in the past with pictures. I expected it to smell much worse, but actually there was very little odor left over. It was different working with hot liquids rather than room temperature liquids but it actually was not that much more difficult. My results were by no means perfect – a bit of a brown tinge on some frames and a slightly darker than normal orange mask make me think that a second blix may be in order. But still, the results were not bad at all and I yielded a few good looking positive images. Very promising results and good enough to encourage me to try again and keep going with this. There’s lots of fun and creativity yet to be tapped into with C-41 processing.
What is your development process like now?
1) In the case of film, shoot a roll of the stock of choice in the camera body of choice.
2) If using my Pentax MV, I rewind the film just until I can hear the tongue break away from the spool. Then opening the camera, I have an exposed film leader, so it’s easy to get my reel started in the light and then put it in the bag to get it loaded the rest of the way. In the case of Canon, I shoot it until there’s 1 frame left, then open it up for that same reason. Granted, that’s not the most efficient use of film because a couple of frames do get lost, but that’s a lot easier than doing it all in darkness. Aside from that with sites like ultra fine online there’s no excuse to pay high prices for film and chemistry.
3) After the negatives are dry, I scan in 16-bit TIFF format so I am left with the rough equivalent of a digital camera RAW file and then import it into GIMP, at which time I invert my negative, adjust exposure, fix up the color, desaturate for black and white images, and then export to a JPEG to be sent off to either my Pinterest page or the film photographers Facebook page.
What’s your processes regarding scanning, enlarging, and/or printing your work?
I primarily scan. I have a Pacific Imaging PrimeFilm 1800u scanner that I bought in 1999 that I still use and it still performs quite well. Astoundingly, it’s still available on Amazon. I can scan negatives as transparent images, the reason being that the software along with the scanner is quite old and it’s better to just scan it as is, than use newer software (in my case the latest GIMP version) to invert, color correct (or desaturate), and beautify.
What equipment are you using to develop your film and why?
I have a standard issue changing bag, Patterson universal development tank, D-76 developer and hardening fixer in the case of black and white. I use the Unicolor C-41 kit in the case of color. Additionally, I have some pyrex measuring cups, a graduated cylinder, and a bathroom where it all takes place.
Are you content with where you are now with your shooting and developing? Do you have any future plans or ambitions?
As mentioned, I just began my journey into color development and I really want to keep going with that. I also do not want to give up black and white film and I don’t want to replace film with digital by any means. I think both formats have their own value. I don’t really have business plans. And as far as publishing goes, I would just like my Pinterest board to be seen by anybody who wants to look at it.
What advice can you give to others who are interested in shooting and developing film but are apprehensive about getting started?
In this day and age it’s never been easier or cheaper to get into film photography. Film SLR cameras can be had amazingly cheap (in some cases free if you have older family members that embrace technology and happen to like you). Film, chemistry and development gear are also quite inexpensive and quite fulfilling as well. If you’re apprehensive, there’s really no reason to be!
Today’s feature comes from Daniel Rodriguez. Daniel tells a story from his perspective of a Mexican-American that most likely echoes true to many first-generation citizens. His work as well as his written story make you understand what many people in America go through on a daily basis: floating in the in-between of identifying and understanding their cultural roots while also attempting to solidify their identity as an American citizen. Daniel brings us on his (and his family’s) journey back to Mexico to document the town in which his father emigrated from to find his place in two different countries.
Reader Excerpts allow those who read Now Developing to become part of the collective by sharing a written piece alongside their images on a topic of their choice. If you have any ideas for a piece and would like to have it featured here, feel free to contact me!
Foreign Observer, shot and written by Daniel Rodriguez (Website, Instagram)
Foreign Observer is a photo series that took me three years to complete and is centered on how I was able to reconnect with my cultural roots through photography. When my dad immigrated to the USA over thirty years ago the only sentence he could confidently deliver in English was “One Jumbo Jack and a Strawberry Shake, please.” A few years passed and he became fluent in English, met my mom, got married and, had 3 kids.
My mom was born here in the states, but was a child of immigrant parents and understood the hardships of life in Mexico. My parents wanted my siblings and I to have that same understanding as well as the knowledge of where we came from. Once my dad became a legal citizen in the 90’s, we would take trips down to Mexico as a family every other year. The trips consisted of lots of handshakes with family we had never met, fireworks, and a temporary suspension of my parents’ anti-junk food rules. These trips felt more like a vacation to me than an opportunity to connect with my culture but that all changed once I became a teenager.
I had dealt with an unusual amount of discrimination as a child and was often treated differently by American kids for being “too Mexican” while also be teased by Mexican kids for being “too American”. I never felt like I fit in anywhere and somehow felt like a foreigner in each land. I remember being 13 years old and walking around the streets of Calvillo, Aguascalientes with my dad wondering how different my life would be if I would have grown up here instead of California.
Would I have discovered my passion for art? Oh man, and what about my love for music? What does it really mean to be an American or a Mexican? I promised myself I would go back next year with my family and finally get a grip on where I fit in between these two cultures, but… the events of September 11, 2001 had happened and new international travel laws required passports cross the US/Mexico border. It was going to take a lot of part-time summer job hours earn enough for a passport.
Pretty soon after that my attention shifted to learning photography, the San Diego Punk Rock/Hardcore scene and my turbulent teen years which bled in to my awkward twenties. Before I knew it, over 10 years passed without visiting Mexico.
I returned to Mexico in 2014 with my family in hopes of closing the chapter I started in December 2000 and photographing the experience. I knew I was going to bring my trusty Nikon N80 with my 35mm F2 lens and 28mm F2.8 lens but I couldn’t decide on what film stock to bring. After thinking things over, it seemed best to take a street photograph approach for this project and I convinced myself to use Kodak Portra instead Kodak Ektar (which is usually my preferred color film) in order to benefit from the faster film speed. I had never really shot with Portra and I was immediately dissatisfied with the results of that first trip back.
I wanted make up for my error in judgement and I ended up shooting almost 40 rolls of Ektar after my subsequent trips in 2015 and 2016. It took a couple months to hand develop, scan and edit all the images but it was such a relief to see my images with the punchy colors and contrast that Ektar is famous for. These shots are a direct result of me walking around aimlessly for hours on end and interacting with the city. I stick out like a sore thumb when I walk around and take pictures since it’s such in small town. Between the guava orchards, churches and bars, there isn’t much to do there.
My dad rented a car and took my Mom and I on a drive during one of our last days there. I spotted a corn field and asked him to stop so I can snap a few pictures. I hopped a fence and walked in to a cornfield to shoot the bundles of corn stalks piled together like giant yellow pyramids.
When I came back to the car, an old man was speaking to my dad and I instantly got nervous and thought he was mad at me for being on his property. I introduced myself as I approached him and he asked me which news channel I was shooting for as he shook my hand. I explained that I was not a reporter, but just a photographer from the U.S. and that I’m here to capture the city my dad immigrated from. He was surprised that someone had taken so much interest in this little city and he praised God for giving me the opportunity to document it.
He said to me, “Listen, son. I think it’s a beautiful thing you’re here capturing these landscapes and finding the beauty of this land. Never forget that you’re a part of this land and its yours as much as its mine, or your fathers. Your home exists on both sides of that border and you know why? Look over there… That’s my home. It may be small and it may be simple, but it’s also yours. You are welcome to it at any time. Whether its a glass of water or a bed to sleep in, it’s there if you need it.”
If you would like to purchase this project in print, Daniel is selling the work here.
In my (hopefully deceased) search for the perfect 35mm rangefinder, I decided to pick up a Leica M2. While I already had a Zeiss 35mm f/2 ZM, I felt that I could really benefit from a 50mm focal length. After a bit of reading, I came across the “Japanese Summilux”, or the Canon 50mm f1.4 LTM. While the extra half of stop would be nice, I decided to go with its slower sibling, the Canon 50mm f/1.8 LTM at a fraction of the cost.
To put both the lens and my ability to judge exposure without a meter to the test, I took my M2 with 50mm attached and HP5 loaded and left the light meter at home.
I took my camera to an exhibition hockey game between the University of South Florida Men’s hockey club team and the USA National Women’s Hockey team who are currently on a tour to garner excitement and get a bit of practice in before the Olympics in Pyeongchang, South Korea later this year.
While shooting a hockey game is typically no easy feat with a dSLR due to the tricky lighting, I found that shooting meterless and on black and white film was definitely a bit more rewarding. Not to mention manually focusing a subject at f/4 that was moving at high speeds. All in all, I was very satisfied with the results.
All images were taken on a Leica M2 with a Canon 50mm f1.8 LTM on Ilford HP5.
Part of the Process is a series of posts that puts the spotlight on film photographers and DIY film developers. These features provide unique experiences and perspectives on shooting and developing film while also showcasing diverse talent and film photographers around the globe. If you are interested in being featured, feel free to contact me!
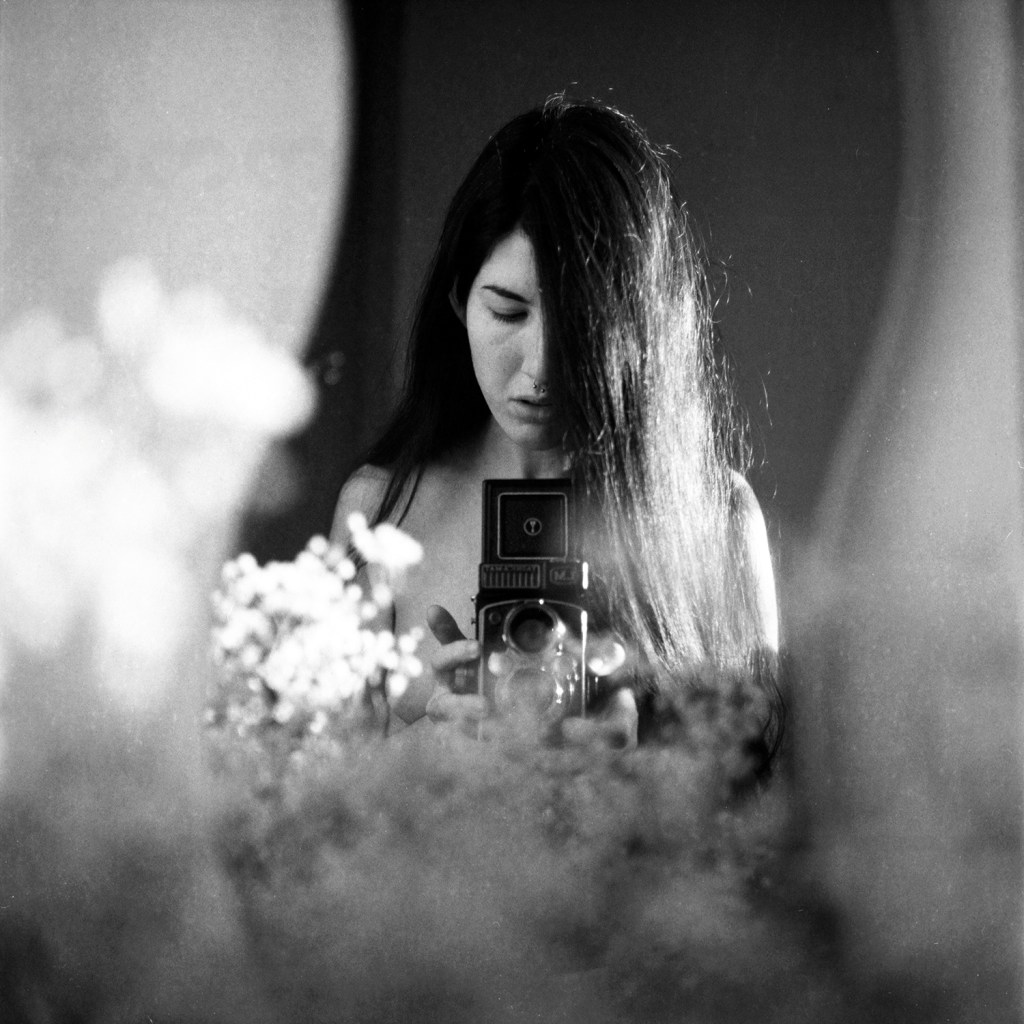
Name: Sara G. Amo
Location: From Barcelona, Spain, but currently living in Iceland
What other websites or blogs do you keep up with to feed your photographic interests?
I like to wander around Tumblr to find other photographers and inspiration.
What attracted you to film photography? How did you get started/introduced to shooting film? How soon after did you start developing?
What attracted me the most are the aesthetics of film and the whole artisanal value of the process of developing. I discovered film when I was studying graphic design, we had a photography class and the first year was all about film photography, so we learned to shoot with film cameras and develop our negatives and prints. After that, when I became more focused in photography, I started shooting and developing by myself at the same time.
What do you like to shoot on a regular basis?
I shoot mostly portraits, but also landscape. I am very interested in human emotions, the connection between humans and nature, and also in the social documentary perspective.
What formats, cameras, and films do you shoot? What do you like about the formats, cameras, films you prefer?
I use mostly 35mm and medium format. I like 35mm because it’s the most easy to bring when traveling, or when going out in the street or hiking in the mountains. It’s light weight, and you have a lot of photographs in every roll. But actually, my favorite format is medium format, I love the depth of the negatives; the results are amazing both in portrait and landscape photography. But it’s also more difficult to use because the camera is a lot heavier and the rolls have less photographs.
So, I often use the 35mm when I’m shooting on my own, and the medium format when I have to work on specific projects.
What types of film do you develop?
At home, I develop black and white, both negatives and prints. In the future, I would like to be able to also develop C41.
Tell us about your first experiences in developing your own film. How did you muster the courage to give it a shot? What resources did you use?
I already had the basics of developing because I learned it at school, but I remember the first time I decided to do it at home, totally by myself alone, and I felt kind of scared of making some mistake and ruining the whole batch of work. But in the end, everything went well and the more I developed, the more confidence I gained to continue doing it.
What is your development process like now?
First, I decide what format or camera I am gonna use depending on the project, after the shooting, I normally don’t develop the rolls until I have many to develop them in a batch.
I send the color film to the lab, also when I have quite a lot of them. After I have all the negatives, I scan them at home and make a selection. Then, I edit the final ones in photoshop, just the basic touches: brightness, contrast, color dominance, and not much more than that. When I have money and I can buy photographic paper, I enlarge some of my favorite black and white prints in the darkroom and scan the final print instead of the negatives.
I also like to experiment with alternative processes, such as cyanotype, van dyke brown, or photographic emulsion, among many others. Alternative processes are really interesting to me but I haven’t got the time to work with them as much as I want. I hope I can work more with them in the future!
What’s your processes regarding scanning, enlarging, and/or printing your work?
I like to do everything by myself. The first thing I did when I got my latest job was buy a professional scanner so I can scan all my negatives at home, because the prices of the laboratory were too high and I also didn’t like the quality of it.
I enlarge and print my black and white photographs in the darkroom, but lately I can’t do it much because of the cost of the photographic paper. But when I have an exhibition, I always do it, the quality of the prints is much better when you develop them in the darkroom.
What equipment are you using to develop your film and why?
I don’t have a fixed darkroom. I would love to have it in the future, but for now I have to use my bathroom (I call it the “bathlab”). I use a Meopta Opemus 6a enlarger and a Paterson tank, because I bought it all together from a friend that was selling all of her darkroom equipment.
Currently, I use Kodak HC-110 as a film developer because I love the results in all the films that I’ve tried, the contrast and tones that you get are perfect, and also because it lasts for a long long time. The rest of the chemicals, including fixer, stop bath and paper developer are from Tetenal, mostly because they are the ones that are more easy to find here and the price isn’t too expensive.
Are you content with where you are now with your shooting and developing? Do you have any future plans or ambitions?
I feel that I am still in the beginning of the journey. I still have to shoot a lot more, I still have to develop a lot of projects that I have in my mind and spread my works so they reach more people. I realized that my way is slow, so everything goes little by little, but the best I can do is enjoy the process, go with the flow, and see what happens next!
Have you completed any notable projects or in the process of creating something from the film you have shot and developed?
I’m currently finishing some projects that I shot in the last years, organizing all the photographs and making the final selections. This is always the most difficult part of the projects for me, mainly because it’s very time consuming and I have to spend many hours on the computer. I prefer to be shooting outside or developing in the darkroom.
My latest finished project that you can find online in my portfolio is ‘A dor da ausencia’, regarding the loss of my grandmother Ilda, probably one of the most special and difficult projects that I’ve done up until now.
What advice can you give to others who are interested in shooting and developing film but are apprehensive about getting started?
Don’t be afraid, start in the most simple way: just find a film camera (ask your family if they have any old cameras or buy a second hand one), buy the cheapest film that you find, and start shooting!
Developing B&W at home is very easy, you just have to learn the basics and start experimenting. You’ll discover a whole new world that will let you experiment photography in many different ways. Don’t worry if you make mistakes at first, keep shooting and practicing, that is the key to grow and improve!